In this tutorial, we tap into the power of OpenAI's ChatGPT to build a GitHub support bot using GPT3, LangChain, and Python.
ChatGPT, ever heard of it?
ChatGPT came out a few months ago and blew everyones’ minds with its ability to answer questions sourced from a broad set of knowledge. Around the time that ChatGPT was demonstrating how powerful large language models could be, the Dagster core team was facing a problem.
⚡ Want to skip right to the code? It’s on GitHub.
What we will cover:
- Our problem
- To fine tune or not to fine tune?
- Constructing the prompt with
LangChain - Dealing with limited prompt window size
- Dealing with large numbers of documents
- Dealing with documents that are too big
- Applying all of this to a GitHub repo
- Trying it out!
- Caching the embeddings with Dagster to save time and money
- Building the pipeline with Dagster
- Retraining on a schedule and recovering from errors
- Future work
Our problem
We build Dagster, a rapidly growing open-source data orchestration solution with a large community Slack instance. Providing a best-in-class support experience is key to the success of our project, but it requires a ton of work from our core team members. When we saw what ChatGPT could do, we wondered if we could create a Slack bot based on the technology that could answer basic questions.
While OpenAI's ChatGPT itself doesn’t have an API, the underlying technology - GPT-3 - does. So we set out on a journey to figure out if we could use GPT-3 to build a bot that could answer basic technical questions about Dagster.
It is worth noting that I’m not an AI expert. There are likely ways that we could improve what we’ve done in this blog post. With that said, let’s proceed!
To fine tune or not to fine tune?
We need a way to teach GPT-3 about the technical details of the Dagster GitHub project.
The obvious solution is to find a way to train GPT-3 on the Dagster documentation (Markdown or text documents). We’d extract every Markdown file from the Dagster repository and somehow feed it to GPT-3.
Our first instinct was to use GPT-3’s fine-tuning capability to create a customized model trained on the Dagster documentation. However, we ended up not doing this for 3 reasons:
- We were not sure of the optimal way to construct training prompts based on the Markdown files, and we couldn’t find great resources to help us understand best practices for fine-tuning.
- It seemed expensive. It looked like it would cost us $80 every time we wanted to retrain. If we wanted our bot to stay up-to-date with the latest changes in the repo (i.e. retrain daily) this cost could add up.
- I spoke with a few people in my network who have deployed GPT-3 to production and all of them were bearish on fine-tuning.
So we decided to move forward without fine-tuning.
Constructing the prompt with open source LangChain
Prompt engineering is the process of developing a great prompt to maximize the effectiveness of a large language model like GPT-3. The challenge with developing a prompt is you often need a sequence - or chain - of prompts to get to the optimal answer.
We came across a great library that could help us with this: langchain. From the library’s docs:
Large language models (LLMs) are emerging as a transformative technology, enabling developers to build applications that they previously could not. But using these LLMs in isolation is often not enough to create a truly powerful app - the real power comes when you are able to combine them with other sources of computation or knowledge.
This is exactly the problem we are trying to solve: we want to take the power of the GPT-3 large language model and combine it with the knowledge encoded in the Dagster documentation. Fortunately, LangChain includes a feature called Data Augmented Generation which allows you to provide some contextual data to augment the knowledge of the LLM. It also has prebuilt prompts for question-and-answer applications like ours.
If we spelunk around the source for LangChain, we can see what the prompt for question answering is:
As you can see, this prompt takes in a question and some sources, and returns a helpful answer along with the most relevant sources. Take a look at one of the examples provided in the prompt for how this looks in practice:
Implementing a toy example in LangChain

☝ For this tutorial I recommend using GitPod to get a consistent Python environment.
pip install langchain - let's get started!
Let’s implement this in LangChain. Install LangChain and some dependencies we’ll need for the rest of the tutorial:
Next, let’s start writing some code. Create a new Python file langchain_bot.py and start with some imports:
Next, we’ll need some sample data for our toy example. For now, let’s use the first paragraph of various Wikipedia pages as our data sources. There’s a great Stack Overflow answer that gives us a magic incantation to fetch this data:
Don’t worry about the specifics of this too much. Given a Wikipedia title and a boolean specifying whether you want the first paragraph or the whole thing, it’ll return a LangChain Document object, which is basically just a string with some metadata attached. The source key in the metadata is important as it’ll be used by the model when it cites its sources.
sources = [
    get_wiki_data("Unix", True),
    get_wiki_data("Microsoft_Windows", True),
    get_wiki_data("Linux", True),
    get_wiki_data("Seinfeld", True),
]
Finally, let’s hook all of this up to LangChain:
chain = load_qa_with_sources_chain(OpenAI(temperature=0))

def print_answer(question):
    print(
        chain(
            {
                "input_documents": sources,
                "question": question,
            },
            return_only_outputs=True,
        )["output_text"]
   )
This does a few things:
- It creates a LangChain chain that’s set up with the proper question-and-answering prompts. It also indicates that we should use the OpenAI API to power the chain rather than another service (like Cohere)
- It calls the chain, providing the source documents to be consulted and the question.
- It returns a raw string containing the answer to the question and the sources it used.
Let’s see it in action! Before you begin, be sure to sign up for an OpenAI API key.
⚠️ The OpenAI API is not free. As you iterate on your bot be sure to monitor how much money you’re spending!
Now that we’ve set up our API key, let’s give our bot a try.
I don’t know about you but I think this is pretty impressive. It’s answering the question, providing additional relevant context, cites its sources, and knows when it doesn’t know the answer.
So, now that we’ve proven that this works, it should be as simple as stuffing all the Dagster docs into the sources section, right?
Dealing with limited prompt window size
Unfortunately, it’s not as simple as dropping the entire corpus of Dagster docs into the prompt. There are two main reasons:
- The GPT-3 API charges per-token, so we should aim to use the smallest number of tokens as possible in our prompt to save money, as we need to send the entire prompt to the API any time a user asks a question of the bot.
- The GPT-3 API has a limit of approximately 4000 tokens in the prompt, so even if we were willing to pay for it, we couldn’t give it the entirety of the Dagster docs. There’s just too much information.
Dealing with large numbers of documents
Let’s see what happens when we have too many documents. Unfortunately we only have to add a few more documents before we hit the token limit:
When you re-run the example, we get an error from the OpenAI API:
There are two options to deal with this. We can either use a different chain, or we can try to limit the number of sources the model uses. Let’s start with the first option.
Using a multi-step chain

Recall how we created the chain in our toy example:
There is actually an implicit second argument to specify the type of chain we’re using. So far, we’re using the stuff chain, which just stuffs all the sources into the prompt. There are two other types of chains we can use:
map_reduce: which maps over all of the sources and summarizes them so they’re more likely to fit in the context window. This will process every token in the corpus for every query, but can be run in parallel.refine: serially iterates over each source, and asks the underlying model to refine its answer based on the source. In my experience this was so slow as to be completely unusable.
So, let's see what happens if we use the map_reduce chain. Update our toy example to pass it as an argument:
And let's re-run the example.
It worked! However, this did require numerous calls to the OpenAI API, and every question asked of the bot will require processing every token, which is slow and expensive. Additionally, there are some inaccuracies in the answer which may have come from the summarization.
We’ve found that using a different method - vector-space search with the stuff chain - to be the best solution so far.
Improving efficiency using a vector space search engine

We can get around the problems with the map_reduce chain and the limitations of the stuff chain using a vector space search engine. At a high level:
- Ahead of time, we create a traditional search index and add all the sources to it.
- At query time, we query the search index using the question and return the top k results.
- We use those results as our sources in the
stuffchain.
Let’s write the code for this one step at a time. First, we need to add some imports:
Next, let’s create a Faiss search index for all of our sources. Fortunately LangChain includes a helper class that makes this a one-liner.
This code does three things:
- It creates a Faiss in-memory index.
- It uses the OpenAI API to create embeddings (i.e. a feature vector) for each source to make it easily searchable. You could use other embeddings if you want, but OpenAI produces high quality ones for this application.
- It adds every source to the index.
Finally, let’s update the rest of our code to take advantage of the search index. For this example, we’ll use the top 4 search results to inform the model’s answer:
And when we run the example, it works! In fact, we can now add as many sources as can fit in a Faiss index (and that’s a lot!), and our model will still execute quickly.
Dealing with documents that are too big

OK, now let’s try dealing with larger documents. Change our sources list to include the full Wikipedia page, not just the first section, by toggling the last argument to False:
Unfortunately we now get an error when querying our bot:
Even though we are filtering down the individual documents, each document is now so big we cannot fit it into the context window.
One very simple but effective way to solve this problem is to simply break the documents up into fixed size chunks. While this seems “too dumb to work”, it actually seems to work pretty well in practice. LangChain includes a helpful utility to do this for us. Let’s start by importing it.
Next, let’s iterate through our list of sources and create a new list called source_chunks, which will be used by the Faiss index in lieu of the full documents:
There are a few things to note here:
- We’ve configured the
CharacterTextSplitterto create chunks of a maximum size of 1024 characters with no overlap. Additionally, they split on whitespace boundaries. There are other more intelligent splitters included with LangChain that leverage libraries like NLTK and spaCy, but for this example we’ll go with the simplest option. - All chunks in a document share the same metadata.
Finally, when we re-run, we see that the model gives us an answer:
Applying all of this to a GitHub repo

Now let’s take what we’ve written and apply it to a GitHub repo. Let’s first add some required imports:
Next, we need a function that’ll check out the latest copy of a GitHub repo, crawl it for markdown files, and return some LangChain Documents.
This does a handful of things:
- It checks out the latest commit of the desired GitHub repo into a temporary directory.
- It fetches the git sha (used for constructing links, which the model will use in its sources list).
- It craws over every markdown file (
.mdor.mdx) in the repo. - It constructs a URL to the markdown file on GitHub, reads the file from disk, and returns a
Document
Now let's hook this up to ourbot. Replacetheprevious `sourcs` list with the following:
Question Answering: Trying it out!
Let’s play around with this and see if it understands the nuances of Dagster’s APIs. We’ll start with asking it about software-defined assets.
I’m pretty happy with this response. It’s able to explain niche technical concepts cogently, and isn’t just regurgitating sentences verbatim out of the docs.
However, at this point you’ve probably noticed that our little bot has gotten quite slow. Let’s fix that!
Caching the embeddings with Dagster to save time and money

We now have a chatbot that works pretty well, but it has a major problem: startup time is extremely slow. There are two steps in particular that are slow that occur every time we import our script:
- We clone the repo using
git, crawl over every markdown file and chunk them - We call the OpenAI API for each document, create embeddings, and add it to the Faiss index
Ideally, we’d only run these steps occasionally and cache the index for subsequent runs. This will increase performance and dramatically reduce cost since we will no longer be re-computing embeddings on startup.
Additionally, it would be great if this process was not “all or nothing”. If we could iterate on our Faiss index or embeddings without re-cloning the repo every time we could massively improve iteration speed.
We no longer have a simple Python script. We now have a data pipeline, and data pipelines need an orchestrator like Dagster. Dagster makes it fast and easy for us to add this multi-step caching capability, as well as support additional features like adding automatic scheduling and sensors to re-run the pipeline on external triggers.
if you want to learn more about migrating to Dagster, check out our previous posts about migrating ETL scripts and software-defined assets. And if you want a high level view of Dagster and orchestration, check out the crash course.
Building the pipeline with Dagster
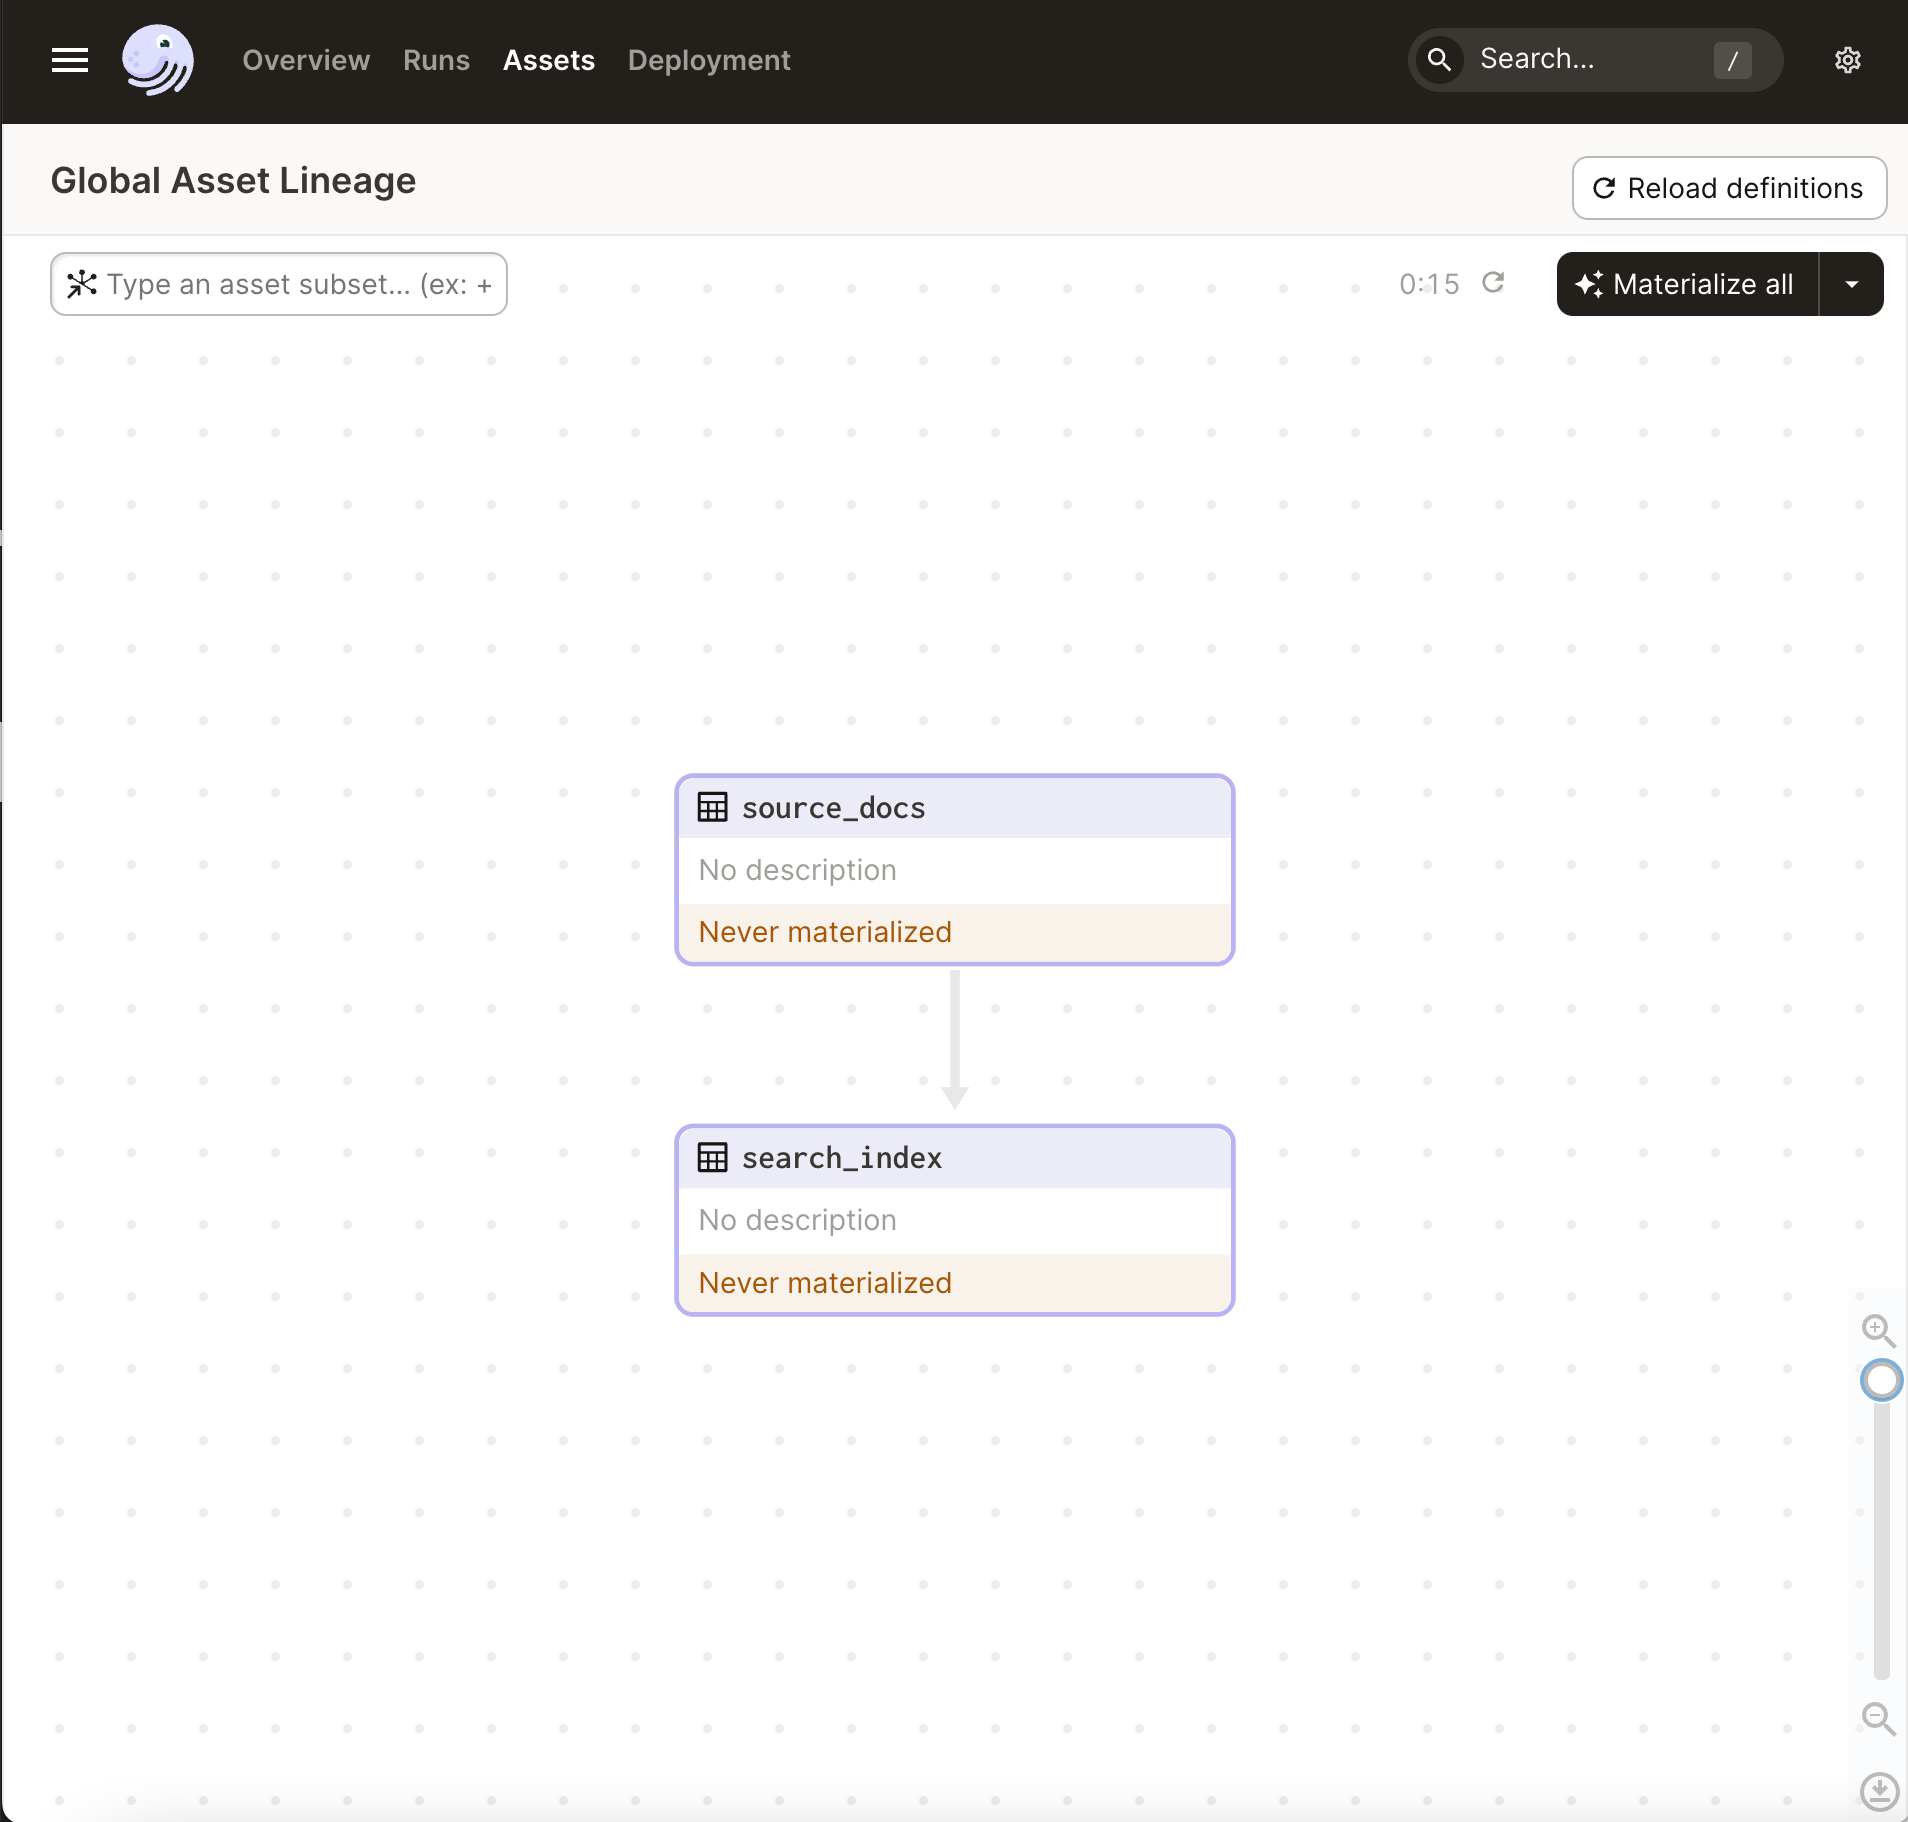
With Dagster, you build your pipeline as a graph of assets. We will start with defining two software-defined assets:
source_docs: the rawDocuments extracted from the git repo.search_index: the Faiss index populated with chunked source documents and their embeddings.
The final search_index will be stored as a pickle file on-disk, and can be accessed by our CLI.
We’ll start by installing Dagster and its UI, dagit:
And of course, we need to add some imports:
pip install dagster dagitNext, let’s create the source_docs SDA. It’s quite straightforward! Just wrap our existing sources list in a function decorated with @asset:
Now that we have our source_docs asset, we can create our search_index asset. Again, we’re basically just moving some code into a function with the @asset decorator.
For the most part the code has remained unchanged. However, there are two important things to note:
- The function takes a
source_docsparameter name. This indicates to Dagster that thesearch_indexasset depends on thesource_docsasset, and Dagster will call (and cache) that function automatically. This also has the nice side effect of improving testability, since in a test environment you can easily override thesource_docsasset with test data. See the docs to learn more about dependencies. - We use Python’s pickle module to store the search index on disk in a file called
search_index.pickle.
Finally, because we don’t have a global search_index anymore, let’s change print_answer() to load it from the pickle file:
Now let’s fire up Dagster and take a look at our pipeline! Run the following in your shell to start the UI:
Now you can browse the UI:

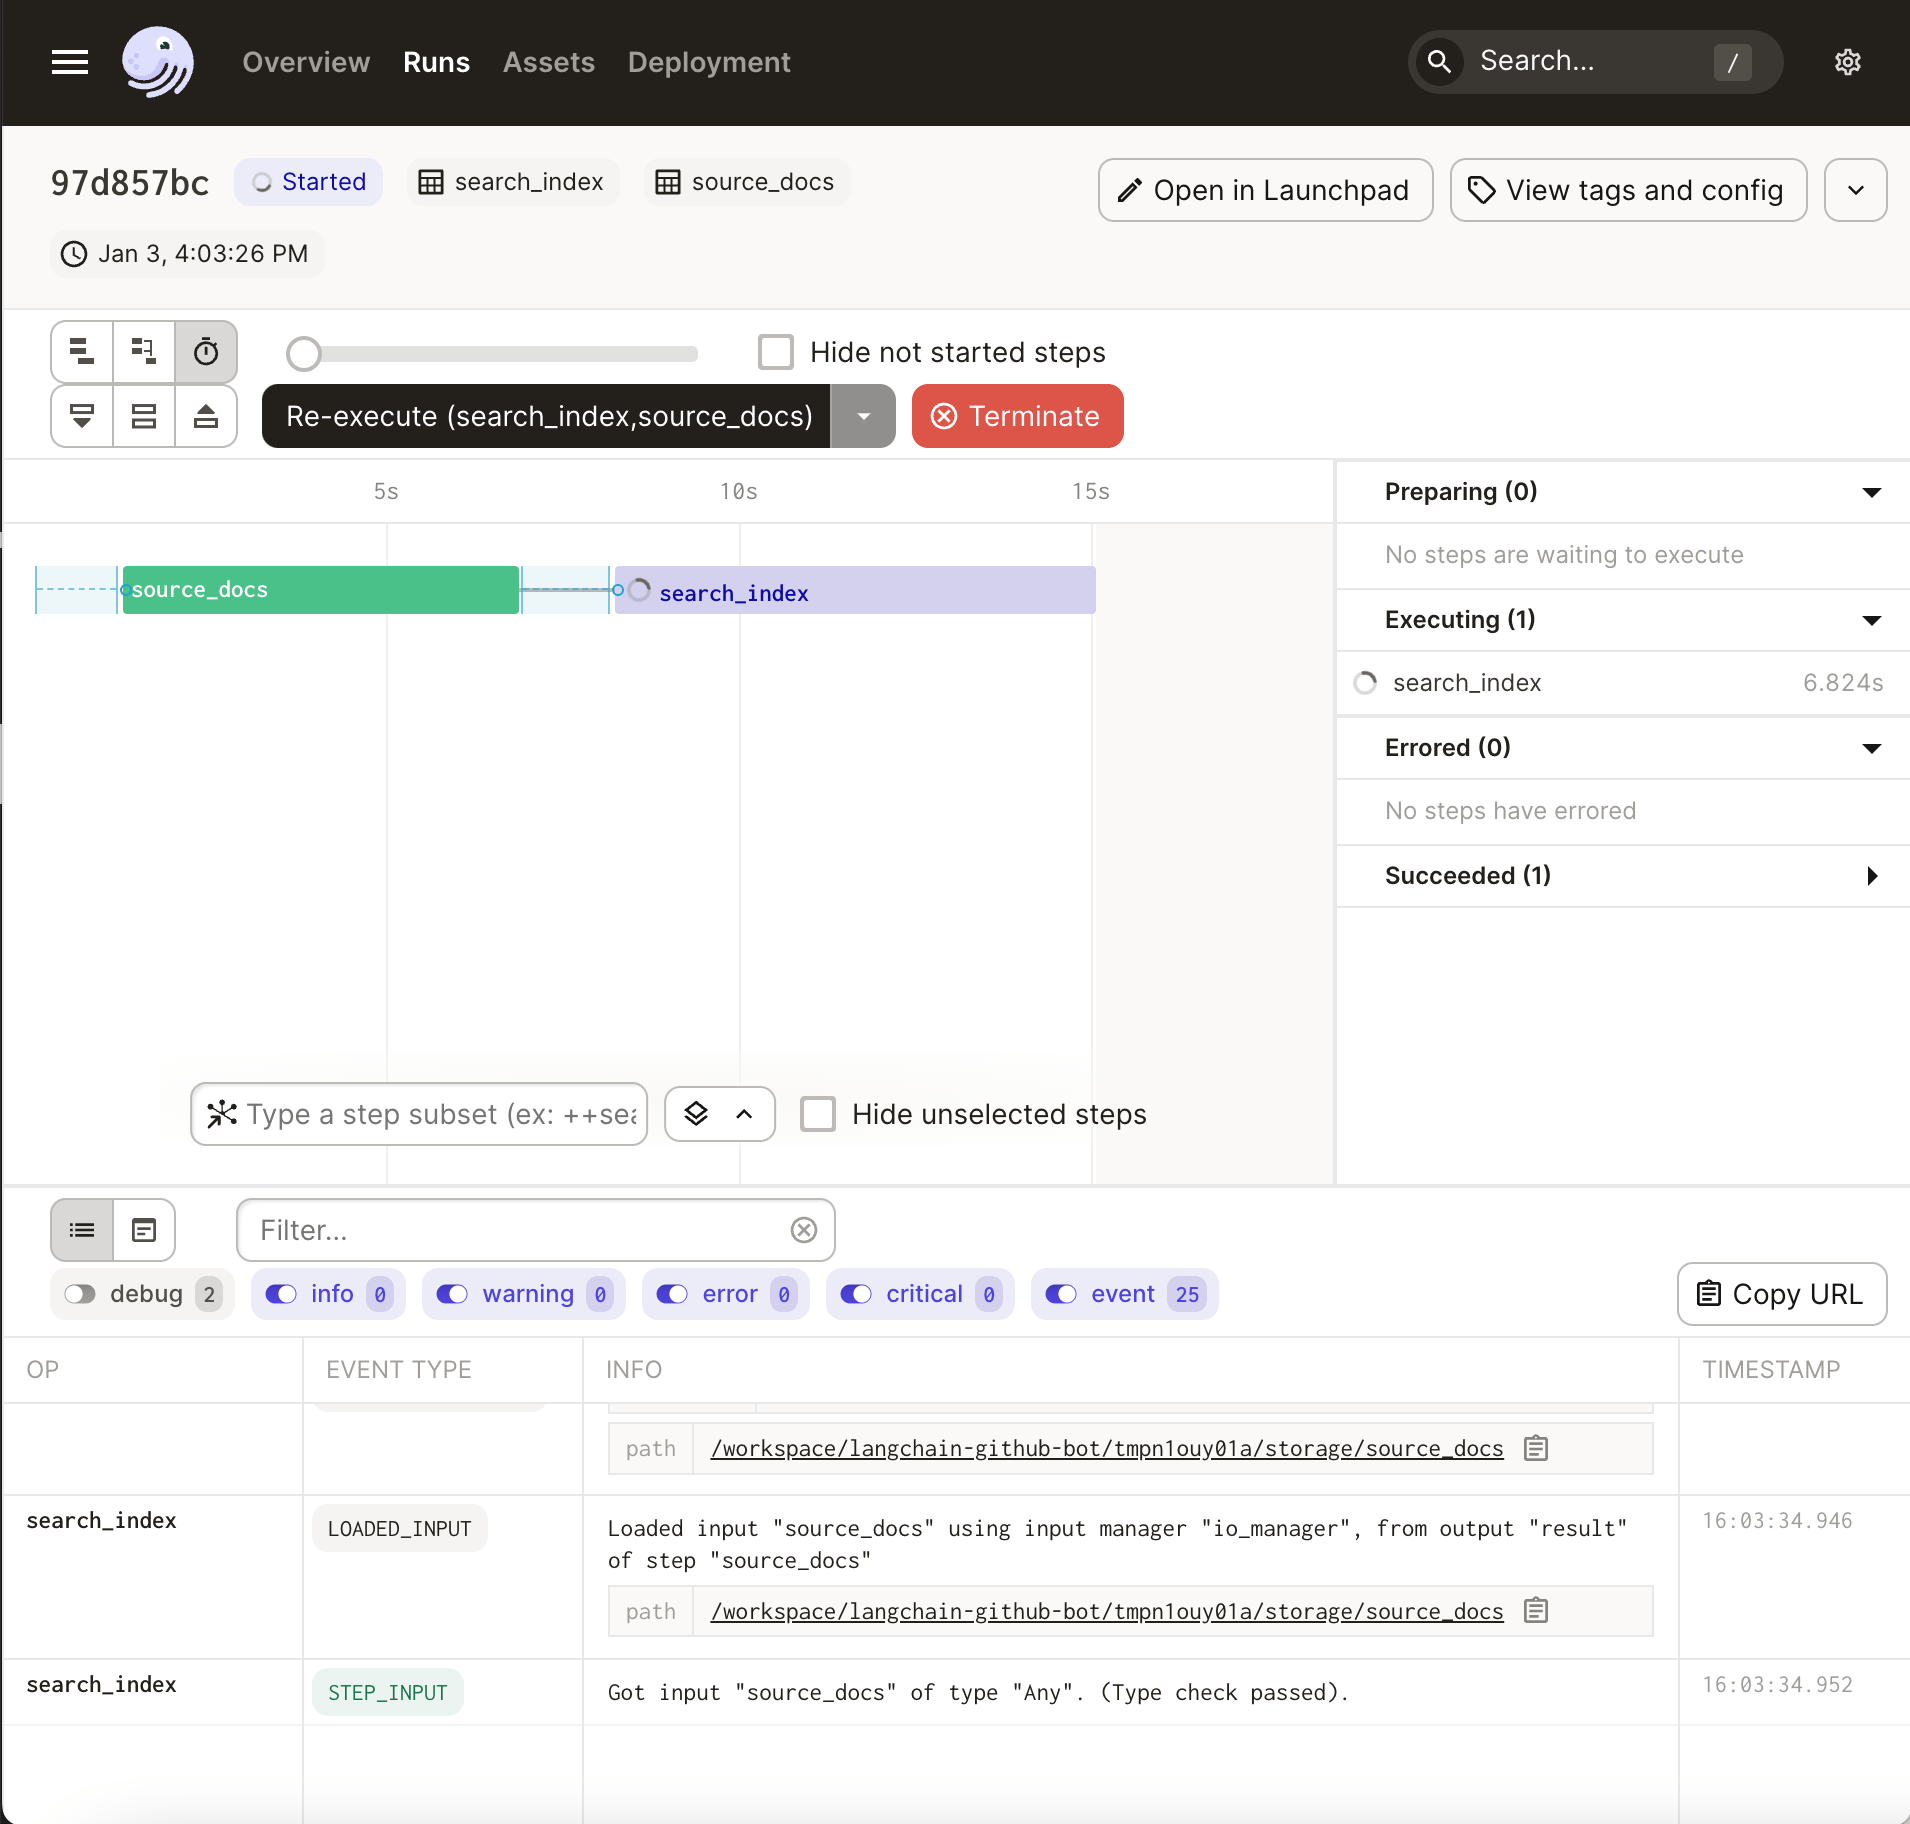
If you hit “materialize all”, you can watch the progress of your pipeline as it executes:

Once it completes (it will take a few minutes), you should see a search_index.pickle file on your local disk. Running our bot should still work, but this time, it should return the result very quickly:
It worked! And it didn’t take 5 minutes this time 🙂
With these simple changes, we now have all of the features of Dagster at our disposal. These include:
- Re-running each step of the pipeline individually
- Declarative retry policies
- Alerting
- Declarative scheduling and SLAs
- Pluggable storage backends
I won’t show all of these today, except for the most important one: scheduling.
Retraining on a schedule and recovering from errors
Let’s make one final change to our project. Let’s configure our pipeline to ensure that we re-index the repo once every 24 hours, and that we retry a few times if there’s a failure. With Dagster, these are both one-line changes. Simply modify the search_index asset as follows:
Now, when we deploy to production, Dagster knows when to re-materialize this asset, and knows that it should retry up to 5 times (with a 5 second delay in between each retry).
Future work
This post ended up getting really long. We covered a lot of ground:
- An overview of LLMs
- How to use LangChain to implement question answering
- How to scale LangChain to large sets of sources and the various tradeoffs
- Leveraging the features of a modern orchestrator (Dagster) to improve developer productivity and production robustness.
However, there are a number of things we didn’t cover in this post that I’ll leave as an exercise to the reader. These include:
- Slack integration. We never actually integrated this with Slack! Fortunately there are excellent official docs about how to do this.
- Dealing with fake sources. Sometimes our LLM invents new URLs and lists them as a source. This can be solved by parsing the response and checking that all URLs that are returned actually appear as a source passed into the chain.
- Better chunking. We could probably do something smarter than the current document chunking method.
- Fine tuning. I know we said we heard that fine tuning wasn’t worth it, but it might be a good idea to actually test that assertion.
- Crawl web pages instead of markdown. It would be relatively straightforward to crawl a website’s HTML pages instead of markdown files in a GitHub repo.
- Support multiple sources. It’d be relatively straightforward to support searching multiple Faiss indexes. For Dagster, we actually use two repos: our OSS repo and our blog repo.
- Integrate Slack history. We tried to add messages from our community support Slack instance and the quality of output was really low. But maybe someone else can do a better job!
Thanks for hanging with me this far. Be sure to give LangChain and Dagster a star on GitHub, and follow me or Harrison (the LangChain author) on Twitter!

We're always happy to hear your feedback, so please reach out to us! If you have any questions, ask them in the Dagster community Slack (join here!) or start a Github discussion. If you run into any bugs, let us know with a Github issue. And if you're interested in working with us, check out our open roles!


